Make any song on your computer a ringtone on your iPhone

iphone
So after a bit of reading I've figured out a way to make your own ringtones out of any song on your computer for your iPhone.

It goes like this.

1. Add file(s) to your iTunes library.

2. Right click Get Info, then options tab.

3. Make the start time and stop time the duration of the ringtone you'd like to use (no longer than 40 seconds though). For example, if you'd like to use the first 40 seconds of a song, make the start time 0:00 and the end time 0:40. If you want to use from 1:40-2:20 then do it like that, just make sure you use whichever part of the song you want to be your ringer and also make sure it doesn't exceed 40 seconds. After you've selected which part of the song will be your ringer, click OK.

4. Right click the song, and click 'Convert Selection to AAC'.

5. Go to your desktop, and make a folder called Ringtones. Once you've done that, go back to iTunes, right click the newly created clip and click copy. Paste it in the folder you just made.

6. Rename the file from whateversongyoupicked.m4a to whateversongyoupicked.m4r (in order to see file extensions you might have to play with your settings a bit) (whateversongyoupicked is just the example, you don't need to change the name of the song, just the extension).

7. Go back to iTunes, and delete the 40 second AAC clip you've made, but be sure to keep the file!

8. Sync/Resync your iPhone, and it should automatically add the file to your ringtone folder.

Free, easy, hackless.

How to Double Firefox Speed

Firefox is in my opinion the best browser ever made until now. It includes:
-improved tabbed browsing
-pop up blocking
-integrated Goggle search
-enhanced privacy controls
-built-in phishing protection
-online spell checking
-lots of themes, interfaces, and extensions/addons

Mozilla Firefox officially supports:
-Microsoft Windows
-Linux
-Mac OS X

Unofficial Support:
-Free BSD
-OS/2
-Solaris
-SkyOS
-BeOS
-XP Professional x64 Edition

Now here are some Tips&Tricks that can help you double the speed of Firefox.

1. Type about:config in the address bar and then press Enter.

2. In the filter search bar type network.http.pipelining. Be sure the value field is set true,if not double-click to set true. HTTP is the application-layer protocol that most web pages are transferred with. In HTTP 1.1, multiple requests can be sent before any responses are received. This is known as pipelining. Pipelining reduces page loading times, but not all servers support it.

3. Go back to the filter search bar and type network.http.pipelining.maxrequests. Double-click this option and set its value to 8.

4. In the filter search bar and type network.http.proxy.pipelining. Once opened doubleclick on it and set it to true.

5. In IPv6-capable DNS servers, an IPv4 address may be returned when an IPv6 address is requested. It is possible for Mozilla to recover from this misinformation, but a significant delay is introduced.
Type network.dns.disableIPv6 in the filter search bar and set this option to true by double clicking on it.

6. CONTENT INTERRUPT PARSING
This preference controls if the application will interrupt parsing a page to respond to UI events. It does not exist by default. Right-click (Apple users ctrl-click) anywhere in the about:config window, select New and then Boolean from the pop-up menu. Then:
A. Enter content.interrupt.parsing in the New boolean value pop-up window and click OK
B. When prompted to choose the value for the new boolean, select true and click OK.

7. Rather than wait until a page has completely downloaded to display it to the user, Mozilla applications will regularly render what has been received to that point. This option controls the maximum amount of time the application will be unresponsive while rendering pages. Right-click (Apple users ctrl-click) anywhere in the about:config window, select New and then Integer from the pop-up menu.
A. Enter content.max.tokenizing.time in the New integer value pop-up window and click OK
B. You will be prompted to enter a value. Enter 2250000 and click OK.

8. CONTENT NOTIFY INTERVAL
This option sets the minimum amount of time to wait between reflows. Right-click (Apple users ctrl-click) anywhere in the about:config window, select New and then Integer from the pop-up menu.
A. Type content.notify.interval in the New integer value pop-up window and click OK.
B. You will be prompted to enter a value. Enter 750000 and click OK.

9. CONTENT NOTIFY ONTIMER
A. This option sets if to reflow pages at an interval any higher than that specified by content.notify.interval. Right-click (Apple users ctrl-click) anywhere in the about:config window and select New and then Boolean from the pop-up menu.
B. Type content.notify.ontimer in the New boolean value pop-up window and click OK.
C. You will be prompted to choose the value for the new boolean. Select true and click OK.

10. Notify Backoffcount
This option controls the maximum number of times the content will do timer-based reflows. After this number has been reached, the page will only reflow once it is finished downloading. Right-click (Apple users ctrl-click) anywhere in the about:config window and select New and then Integer from the pop-up menu.
A. Enter content.notify.backoffcount in the New integer value pop-up window and click OK.
B. You will be prompted to enter a value. Enter 5 and click OK.

11. CONTENT SWITCH THRESHOLD
You can interact with a loading page when content.interrupt.parsing is set to true. When a page is loading, the application has two modes: a high frequency interrupt mode and a low frequency interrupt mode. The first one interrupts the parser more frequently to allow for greater UI responsiveness during page load.
The low frequency interrupt mode interrupts the parser less frequently to allow for quicker page load. The application enters high frequency interrupt mode when you move the mouse or type on the keyboard and switch back to low frequency mode when you had no activity for a certain amount of time. This preference controls that amount of time. Right-click (Apple users ctrl-click) anywhere in the about:config window and select New and then Integer from the pop-up menu.
A. Enter content.switch.threshold in the New integer value pop-up window and click OK.
B. You will be prompted to enter a value. Enter 750000 and click OK.

12. NGLAYOUT INITIALPAINT DELAY
Mozilla applications render web pages incrementally, they display what’s been received
of a page before the entire page has been downloaded. Since the start of a web page
normally doesn’t have much useful information to display, Mozilla applications will wait
a short interval before first rendering a page. This preference controls that interval. Rightclick (Apple users ctrl-click) anywhere in the about:config window and select New and then Integer from the pop-up menu.
A. Enter nglayout.initialpaint.delay in the New integer value pop-up window and click OK.
B. You will be prompted to enter a value. Enter 0 and click OK.

15 Top Windows XP secrets

1. Useful key shortcuts available:

- Windows key + D - shows the desktop
- Windows key + M - minimizes all open windows
- Windows key + Shift + M - maximizes all open windows
- Windows key + E - Runs Windows Explorer
- Windows key + R - shows the RUN dialog
- Windows key + F - shows Search window
- Windows key + Break - shows System Properties box
- Windows key + TAB - Go through taskbar applications
- Windows key + PAUSE Display the System Properties dialog box
- Windows key + U Open Utility Manager
- ALT + TAB - Cycle through opened applications
- Hold down CTRL while dragging an item to Copy it
- CTRL + ESC Display the Start menu
- ALT + ENTER View the properties for the selected item
- F4 key Display the Address bar list in My Computer or
- NUM LOCK + Asterisk (*) Display all of the subfolders that are under the selected folder

2. Lock Windows to protect computer
You can lock Windows to protect the computer when leaving the station easily by creating a shortcut with the path rundll32.exeuser32.dll, LockWorkStation. The Windows key + L is also a shortcut to this feature.

3. Edit sysoc.inf to list all software
To show all software that can be removed from your computer (including protected Windows services), you can manually edit (using notepad for example) the sysoc.inf file located in Windows\inf\. Just remove the word hide next to the software pack.
*Note* - use this at your own risk. Removing critical components of the system will make Windows instable.

4. Windows XP comes with IPv4 and IPv6

Windows XP comes both IPv4 and IPv6 support. To enable IPv6, you can install the protocols needed with the command "ipv6 install" in the command-prompt. Then type ipv6 /? to see the options. The installation will not remove the IPv4 protocols so your current configuration will still work.

5. Access Task Manager with shortcut

To access the Task Manager easier, you can make a shortcut that points to %windir%\system32\taskmgr.exe.

6. Stop treating ZIP files like Folders

If you don't want your Windows XP to treat ZIP files like folders, you can disable this component by running regsvr32 /u zipfldr.dll at the command prompt or Run dialog. If you start missing it, you can enable it by typing regsvr32 zipfldr.dll.

7. Run program as diffrent user

You can run a program as a different user. Right click an application and select Run As command.

8. Switch users leaving applications opened

You can switch users leaving the applications opened too (*NOTE* use this only when needed since it could lead to system instability).
Go to Task Manager - processes and end the process explorer.exe. This will end only your session and not all applications. Then go to Applications tab, click New task and type runas /user:domainname\username explorer.exe. A password prompt will appear to login to the desired username. The user's session will start, with all your previously applications running.
I recommend to open first a command-line prompt and type runas /? to see all the options available.

9. Rename multiple files in Windows at once
Rename multiple files in Windows at once. Select them all, right click and select Rename. Enter the desired name. They will be renamed using what you specified, with a number in brackets to distinguish them.

10. Task kill feature in Windows

Windows has a task kill feature similar to Linux. Go to a command prompt and run the command tasklist to see running processes with PID numbers. Then type tskill to end the specific task. This forces an instant closing of the task.

11. Edit features with GPEDIT.MSC
You can edit many features by running gpedit.msc. You can add log on/log off scripts here and many features.

12. Edit accounts in the command prompt
You can edit accounts by running "control userpasswords2" at the command prompt.

13. Use systeminfo.exe to see System Information

You can use the systeminfo.exe command in the command prompt to see System Information, including all Windows updates and hotfixes.

14. Disable system services for maximum performance
There are system services that you can disable to free up the system's load. To access the interface that permits you to make changes to system's services, type services.msc and the command prompt.
This is a list of services that are *usually* useless and can be safely disabled.
Alerter
Application Layer Gateway Service,
Application Management
Automatic Updates
Background Intelligent Transfer
Clipbook
Distributed Link Tracking Client
Distributed Transaction Coordinater
Error Reporting Service
Fast User Switching Compatibility
IMAPI CD-Burning
Indexing Service
IPSEC Services
Messenger
Net Logon
Net Meeting
Remote Desktop Sharing
Network DDE
Network DDE DSDM
Portable Media Serial Number
Remote Desktop Help Session Manager
Remote Registry
Secondary Logon
Smartcard
SSDP Discovery Service
Uninterruptible Power Supply
Universal Plug and Play Device Host
Upload Manager
Webclient
Wireless Zero Configuration
WMI Performance Adaptor

*NOTE*: Make sure you don't need them since some applications you're using could depend on them. If you make any application to fail by disabling any of the services, go back and enable it again.

15. Repair Windows XP by using the XP installation CD
If your system failes to start due to an error related to missing HAL.DLL, invalid Boot.ini or any other critical system boot files you can repair this by using the XP installation CD. Simply boot from your XP Setup CD and enter the Recovery Console. Then run "attrib -H -R -S" on the C:\Boot.ini file and delete it. Run "Bootcfg /Rebuild" and then Fixboot.

A Great Cool Google trick

1. Go to
http://www.google.com

2. Click "images"
3. Fill in "bikes, flowers, cars" or any other word.
4. You will get a page with a lot of images thumb nailed.
5. Now delete the URL on the address bar
(example: http://images.google.nl/images?hl=nl&q=flowers&btnG=Afbeeldingen+zoeken&gbv=2)

6. Copy the script down here, and paste it in your address bar :

Job at Google : Working in Heaven ?

We already knew that working for Google had certain advantages, but, believe me, this giant of the search motor takes the welfare of its employees seriously ... as shown by this decompression (stress) capsule that is impermeable to sound and light ...

Job at Google


Visit to Google's European center in Zurich

MOVING AROUND: A slide allows quick access from different floors ... There are also poles available ... they are similar to the ones used in fire stations.

Job at Google


FOOD: Employees can eat all they want from a vast choice of food and drink.

Job at Google


WORK STATION: Each employee has at least two large screens. There are 4-6 'Zooglers' per office.

Job at Google


INNOVATION: Large boards are available just about everywere because "ideas don't always come when seated in the office" says one of Googles managers.

Job at Google


LEISURE: Pool tables, video games etc. are available in many areas.

Job at Google


COMMUNICATION: On each floor, there are private cabin areas where employees can attend to personal affairs.

Job at Google

TECHNICAL SUPPORT: Problem with your computer ? No problem ... Bring it to this area where drinks are available while it is being fixed ...

Job at Google

HEALTH: Professional masseurs (eusses) available.

Job at Google


REST: This room provides massage chairs that you control ... while you view relaxing aquariums ... !!!

Job at Google

Now tell ,wanna work with Google ?,

Qualities of a Highly Profitable Webmasters

Qualities of a Highly Profitable Webmasters
This article details a few simple things that seasoned webmasters do that allow them to pull ahead of their competition. As a savvy web hosting customer and webmaster, these are steps you can take yourself.

  1. Off-site Backups - It amazes me whenever I hear of a website hosting user complaining about "that great twenty-dollars-a-year website host I was using that disappeared and took all my files with them!" This is a consistent complaint in the industry, and it is so easily prevented. How do savvy webmasters avoid losing their files? Keep a backup either at your physical location, or on a web server in a different geographical region than the one your website is hosted on.
  2. Independent Domain Registration - The second most-common complaint is a domain name that is held hostage by a web host, either because of misunderstanding between the client and the host, or because of an underhanded host. How can you prevent this? Register your domain name at GoDaddy.com, Netsol, Register.com, eNom, or one of the other domain registrars. Then, just point the domain to your hosting account. This way, if your host goes under or you decide to cancel your hosting account, you won't have to worry about losing your domain.
  3. Good Client-Host Host-Client Relationship - As lame as it may sound, it helps to have a positive relationship with your host. You need to trust them 100%, and they need to trust you 100%. If this is not the case, neither one of you are benefiting the other, and it is a relationship that should be broken off.
  4. Regular Website Updates - Want to know what irks users more than anything else? A website that never changes! Even if you have only five minutes a day to devote to managing your site, you should have some little tidbit of information that changes on a daily or weekly basis. Site visitors like to know that there is really a living, breathing thing on the other side of that website, and one way to convey this is by showing change.
  5. Prompt Reply to Emails - Well, maybe this irks users more than anything else. It's probably a toss-up between points four and five. But the point is this: When someone sends you an email, they expect it to be answered right away. So answer it right away! If you can't do this, hire someone who can. One of the best things you can do for your company's image is to answer every single customer inquiry in a super-fast manner. Not only does this impress your customers, it also shows them that you truly care.
Follow this advice, and I guarantee you'll see more success from your web-based business!

Courtesy : Webhosting Talk

Building A Personal Computer Tutorial

Building A Personal Computer Tutorial
Introduction

In this tutorial I will try an teach you how to successfully build your own computer! There are many benefits to building your own computer.

1. You get hand's on experience learning how a computer works
2. Its a hell of alot less expensive then buying one from a retailer
3. Its a hell of alot more reliable than buying one from a retailer being that you hand select QUALITY parts and put it togethor yourself.
4. You can do your own tech support no more relying on stupid Best Buy Tech's that don't know the difference between their ass and a hard disk jumper (don't worry I'll tell you what those are later)

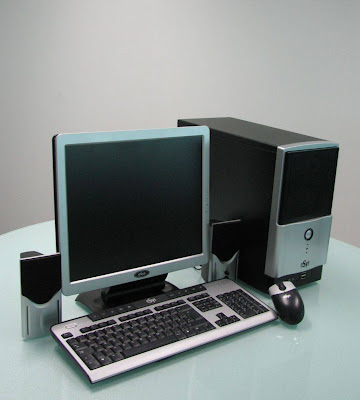
Section #1 (What Your Going To Need)

Here we will discuss a list of the parts you need and the best place to purchase them. If you want the best
prices on computer hardware you will definitly want to look online. Unfortunatly (and for some of you very fortunatly
if you know what I mean) this requires the use of a credit card. Below is a general list of the devices you will
need...

1. A Computer Case (Something To Put All The Computer Parts Togethor In)
* Should only run you about 50 dollars
* Beware the cheap ones with cheap power supplies they will die in a year
2. A Mother Board (Everything Will Be Plugged Into The Mother Board)
3. A Floppy Drive and a CDROM (Should Be Obvious)
4. A Hard Disk (Come In Many Different Flavors and Quality Levels, Stores All The Information In Your Computer)
5. A Video Card (Cheap Stuff, Its What Your Monitor Plugs Into)
6. IDE Controller Ribbon
7. Miscellaneous Accessories

Next we'll take a look at many of the different options you have when buying these pieces of equipment. Your choice
may vary depending on which Operating Systems you plan on running.

Section #2 (Which Brand And Model Should I Buy?)

We'll lets start with your computer case and move all the way down to Miscellaneous Accessories..

1. Computer Case

You will most certainly need an ATX style case with a quality power supply. How do you tell? Well if the case
is only 15-20 bucks theres a pretty good chance its a crappy power supply.

2. A Mother Board

I suggest a quality ASUS (ATX style to match your computer case) mother board its up to you ask your friends.
I've had bad experiences personally with FIC
mother boards.

3. A Floppy Drive and CDROM

Pretty inexpensive stuff, i'd suggest a Sony Floppy drive and a generic CDROM. Doesn't make too much a difference if your
concerned about getting the best price.

4. Hard Disks

Gets alittle tricky. If you want reliability, high speed transfers, and are willing to run Windows I suggest a Western Digital
or a Seagate ULTRA DMA-66. If your not to concerned with speed and want to run a server with Unix i'd go with a Fujitsu or
a Western Digital. Their farely inexpensive but only transfer in 33 megabit bursts as apposed to the DMA-66 which transfer
in 33 megabit bursts. I don't believe Unix currently supports ULTRA DMA-66, but don't quote me on that. Now there's an even faster
transfer rate available via SCSI Hard Disk Controllers, but i'm not about to go into setting up SCSI controllers in this tutorial.
For now we will stick with IDE Hard Disk controllers.

5. Video Cards

Video cards are cheap and if your not a gamer a plain ole gener Cirrus Logic or STB video card will do fine.

6. IDE Controller Ribbon

You'll need 2 different kinds of IDE Ribbon 2 40 pins for your CDROM and Hard Disk and Another with less pins for your floppy.
You can buy these at any local computer store or order them off the web.

7. Miscellaneous Stuff

You may be interested in adding a sound card, ethernet card, and/or 3DFX card to your system. These are relatively easy to do and
I will explain how to add card's to your mother board later.

Section #3 (Where do I buy all this crap!?)

Well if your looking for the best prices online for computer hardware (and this is my unbiast opinion) i'd suggest going to


http://www.pricewatch.com


Section #4 (Lets Assemble!)

This next part is very important so read carefully...

1.

First things first get yourself a clean desk to work on.

2.

Place your ATX stlye computer case on the desk and slide/lift the top off. Inside should be a bunch of wires coming out
of the power supply in the back and a bunch of wires coming out near the face of the box.

3.

The next thing your going to want to do is place your mother board inside the case and fasten it in. Their might be
metal coverings covering the holes in the computer case were the parralel ports and serial ports on the mother board
should poke through, go ahead and poke those out with a screw drive so you can fit the mother board in snuggly. Every
Case fastens mother boards in different ways. Some use plastic pegs, some use metal screws. It will hopefully be obvious
which you have to use.

4.

#4 Once the mother board is mounted properly you will need to fasten the floppy drive, and cdrom into the computer case.
All computer cases store floppy drives differently there maybe a slide out container that you screw them into. You'll
have to make sure that the the floppy drive is right side up (duh!) and that the pins are facing towards the back of the
computer. Installing the CDROM is pretty much the same in all computer cases. Some mounting rails should have come
with your mother board. You need to fasten those to the sides of the CDROM and you should be able to slide it right in
to one of the top bays.

5.

Insert your Video Card. There are presently about 3 differnet forms of slots on your mother board. PCI, ISA, and AGP.
Video Cards are presently made for all 3 of them. AGP stands for "Accelrated Graphics Port" Video Cards made for this
slot are generally more high tech/performance. PCI's work and so do ISA (Althoug ISA is more Old School). Gee how
do I tell the difference? Well AGP slots more than likely is the only small, brown, slot on your mother board. PCI
you probably have the most of these their white and little longer than AGP. ISA, these are longggg and black, ugly.
Insert your Video Card and snug it in there firmly. Don't force it (duh).

6.

Time for that evil Hard Disk installation. We'll Hit hooking up the power supplies and Installing the Hard Disk at the
same time just for fun. Insert the Hard Disk In a very much similar way to the way you inserted the floppy disk. But
Before you do make sure that the jumper settings are correct on the back of Har Disk. Most hard disks are shipped in
single mode, but if you want to run multiple hard disks (which we won't discuss) you need to set the jumpers differently.
Jumpers are little metal prongs connected with little jumpers that complete a connection. You figure it out. Anyway
you got your hard disk in now its time to hook up the power supplies. The hard disk and the CDROM have similar power supp
lies. 3 or 4 prong. Hook those funny looking cords coming out of the back of the power supply into your CDROM and Hard
Disk. Theres a smaller one that hooks into your floppy it should be obvious. Theres a big power supply (the biggest one
in the lot usually made of white plastic) It fits into a slot on your mother board, it is the main power supply to your
mother board. Its kind of tricky to get in so be careful.

7.

Now that you have your Power Supplies hooked up you'll need to connect your Periphrials to your Mother Board. Use the IDE
Controller Ribbon I know you all have. Hey one end goes to your CDROM (make sure the red line on the ribbon "pin 1" is
matched up with the first pin on the back of your CDROM) and the other end goes to your mother board (same deal). The
same goes for your hard disk and yoru floppy. Figure it out its not that difficult. You'll know you did something wrong
when you get a floppy disk fail on boot.

8.

Finishing touches. Don't forget to connect those nasty wires coming out from behind the face of your computer case to
your mother board. They control the on, off, reset, hard disk activity, and power switch. Every mother board is different
so i hope you have a manual with your mother board. Most specify with 2 or 3 character paraphrases that make no sense.
For Example "PWR SWT" = Power Switch "RST SWT" = Reset Switch. Or even more vague than that.

Section #5 (Testing 1, 2, 3)

Ok your ready to give it a whirl, you'll need to get in your system bios. The "DEL" key should usually get you in.
Get it to autodetect your hard disk. Accept the Setting and Save your Configurations. Install Your OS and your ready to go.
That easy!! Ha! you'll prolly have lots of trouble theres a million resources online to help you. Get to it.

Design by Dzelque Blogger Templates 2007-2008